
Hi there,
This is the procedure for the click-to-call:
- Open a Google Chrome web browser
- Download and install Click To Call Plugin from here: https://chrome.google.com/webstore/detail/linkedip-click-to-call-ch/finldhbibgcbhjhejnhekkjkjinpeikg
- You will find a new icon with the shape of a small phone at the top bar:
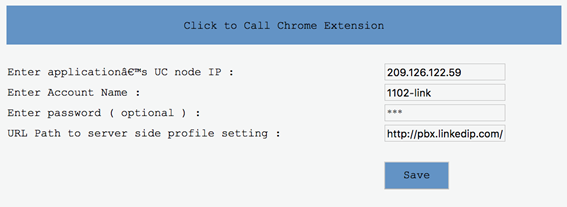
- Click on it and then click on Configuration. You will see a pop up window like this:
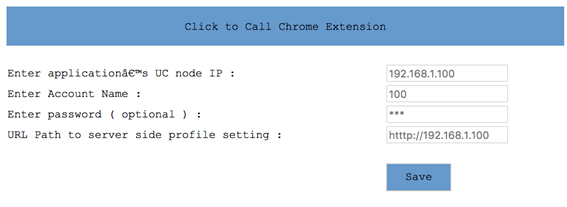
5. Please update the configuration form with the following fields:
- Application’s UC Node IP: 209.126.122.59
- Account Name: (enter the extension’s account name - Ex: 1102-link)*
- Password: (leave it blank)
- URL Path to server side profile setting: http://pbx.linkedip.com/
- It should look like this:
- Click on Save and that’s all!
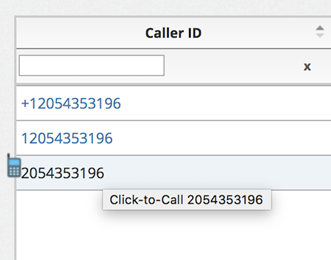
Once you have saved the settings and everytime there is a phone number on a website you will see a phone icon next to the number. Just click on the icon to initiate a call:
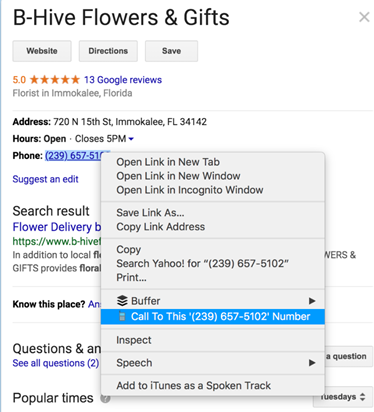
Alternatively you may also right click on a phone number and a menu will appear. You may click where it says “Call To This … Number”:
*To find out Account Name you need to access to your pbx.linkedip.com portal with your credentials. If you don't have credentials yet please contacting us.
Should you have any questions do not hesitate to contact us at support@linkedip.com
Regards!
Comments
0 comments
Please sign in to leave a comment.